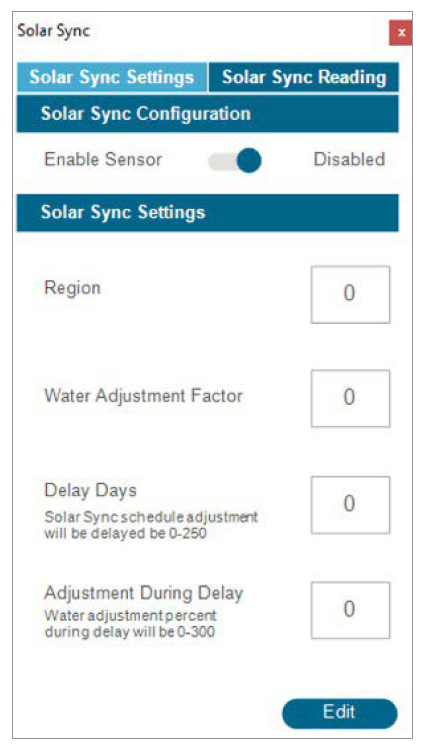
After connecting a Solar Sync Sensor to the controller, set up operation in the Devices > Solar Sync menu.
- Press the toggle button to Enable Solar Sync.
- Set the Region and Water Adjustment, according to the Solar Sync manual instructions.
- For normal operations, this is all that is necessary; it will take the Solar Sync Sensor two or three days to register enough climate data to begin adjusting.
Solar Sync Delay
This feature allows a number of days to pass before the automatic Solar Sync adjustment goes into effect (e.g., to establish new landscape). Enter the waiting period in number of days (1 to 250), and specify the Adjustment During Delay percentage to use during the delay period. At the end of the delay, the Solar Sync Sensor will automatically adjust to the current climate conditions. The delay does not interfere with the Solar Sync Rain and Temp functions. They are still able to perform shutdowns due to rain or freezing events during this delay. Complete the setup by setting the programs to use Solar Sync in the Program > Seasonal Adjust menu.
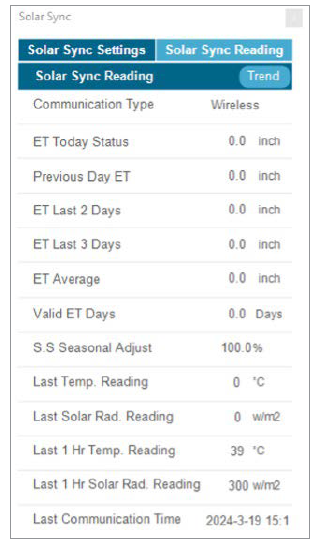
Solar Sync Reading provides the values for the previous Solar Sync seasonal adjustment, average ET, current/last three day’s ET, last temperature reading, last solar radiation, and last hour temperature/solar radiation reading. Last Communication Time represents the last time the controller updated these values to Hunter 360 Software.
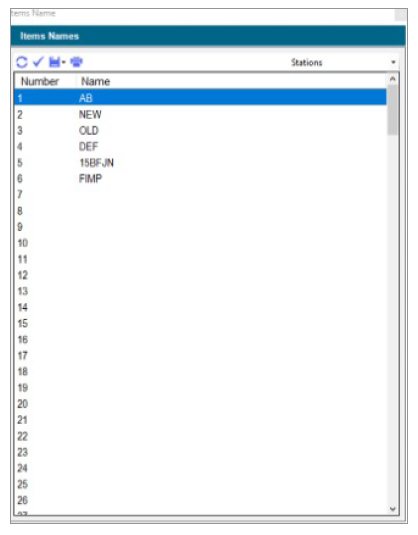
This screen is used to name individual stations within a controller. Click on an existing controller, and the Controller menu will appear. From that list, select Item Names to open this screen, and enter names for each station. Click the Save button to send to the controller.
Still need help? We're here.
Tell us what you need support with and we'll find the best solution for you.